Product Overview
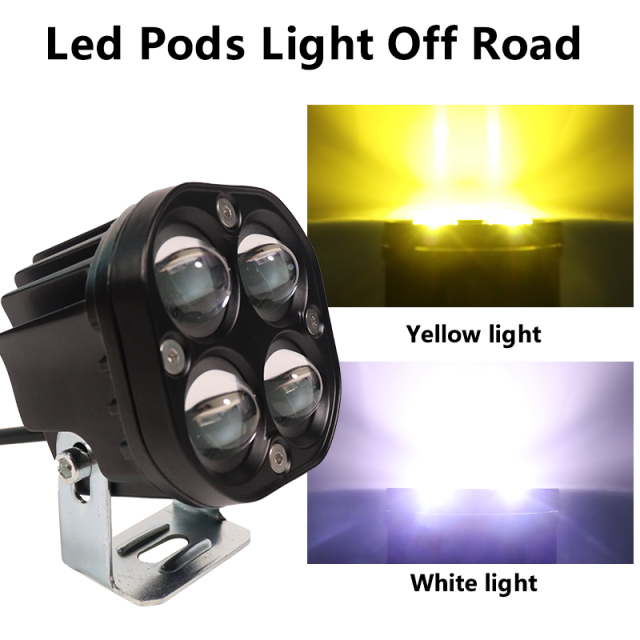
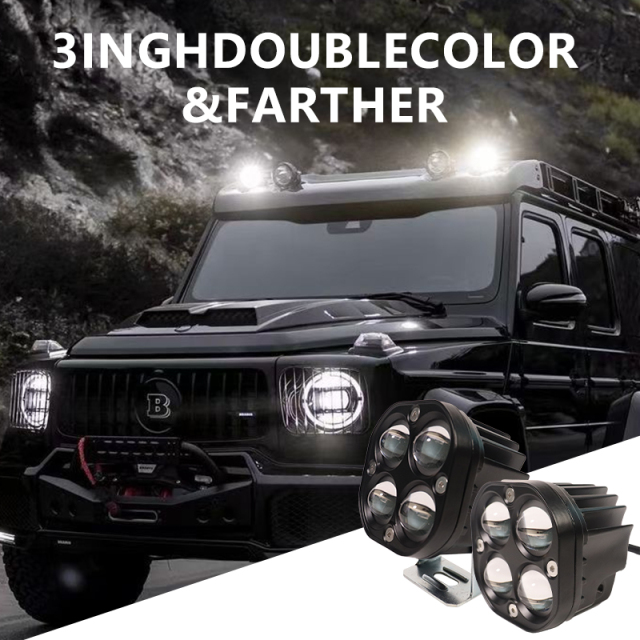
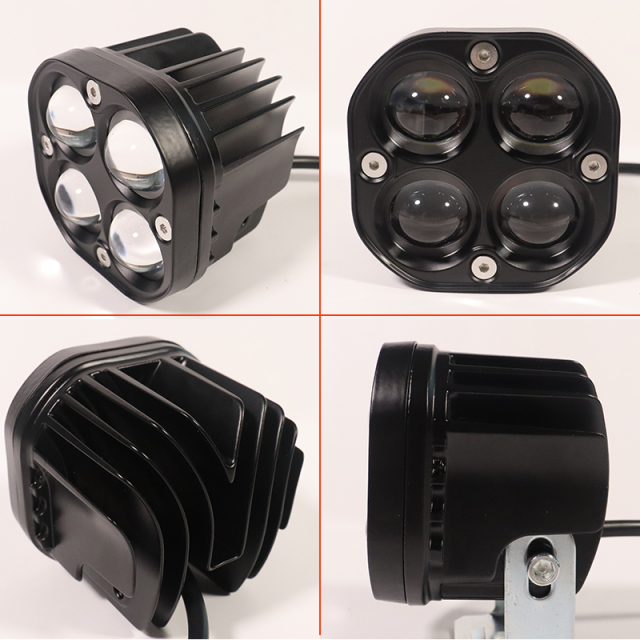
Most LED driving lights make the buyer choose at the counter: a yellow fog lamp or a white driving lamp, one or the other. This 3-inch pod carries both beams in a single housing and lets the driver pick the one the weather calls for. The idea is simple. Instead of fitting a separate fog lamp and a separate driving lamp — two housings, two brackets, two holes in the bodywork — one pod does both jobs. A distributor stocks one part number. A workshop fits one bracket across a mixed range of vehicles. A fleet keeps fewer variants on the shelf, and any driver can work out at the roadside which beam to use. That makes it a straightforward upgrade for vehicles that already run auxiliary lamps, and an easy first install where the factory lamps are not enough on their own. Trucks, SUVs, pickups, ATVs, UTVs and motorcycles are the most common homes for it, but the mounting is universal — anywhere there is a flat surface and an auxiliary lighting circuit to tap, it can go. The housing is die-cast aluminium with aviation-grade materials chosen for heat dissipation and long service life. Dual beam technology switches instantly between the yellow fog-enhancing output and white illumination, so one lamp adapts to changing conditions. Adjustable stainless steel mounting brackets let the installer set alignment to suit the vehicle's architecture, whether that is a truck, a motorcycle or an off-road build. Where heavy trucks run through fog-prone or wet regions, the yellow beam cuts through moisture-laden air that would otherwise scatter white light, improving how much of the road the driver can actually see. That helps lower accident risk in low-visibility conditions and supports compliance with vehicle safety standards. The lamp works alongside factory-installed beams rather than replacing them, and the adjustable brackets let the angle be set so the light falls where the driver needs it on delivery routes. Look at this pod from a counter rather than a catalogue and its value is easier to see. One part number covers two jobs, so a shop can stock a single box and still answer the customer who wants a fog lamp and the customer who wants a driving lamp. That is why buyers assembling a custom auxiliary lighting range tend to keep a dual-color pod near the front of the line — it earns its shelf space twice over. The 3-inch body is the second advantage. It fits a bull bar, a bumper cut-out or an A-pillar mount where a full-width bar would be too much metal, too much wiring and too much current draw, and it leaves room for a second pod when the customer wants a pair. Third is the sealed construction. Moisture is the most common reason an auxiliary lamp comes back, and it usually arrives through the lens joint rather than the housing. The rubber ring and gasket behind the lens close that route, and a powder-coated aluminum body does not rust through where a stone has chipped the paint. Fourth is the bracket. An adjustable stainless mount lets one part fit a wide spread of vehicles and be re-aimed when the load, the tyres or the use changes, which is what keeps a stock item from turning into a dead one. Put together, these are the things that separate auxiliary lamps that sell once from lights that get reordered — and they are the reason a compact dual-color pod holds its place in a range even when the catalogue already lists a dozen other shapes. It is also a sensible first line for led light bar manufacturers and shops moving beyond generic truck driving lights, because the specification does the explaining: sealed body, aluminum housing, adjustable bracket, two beams.
Dual-Color Beam System
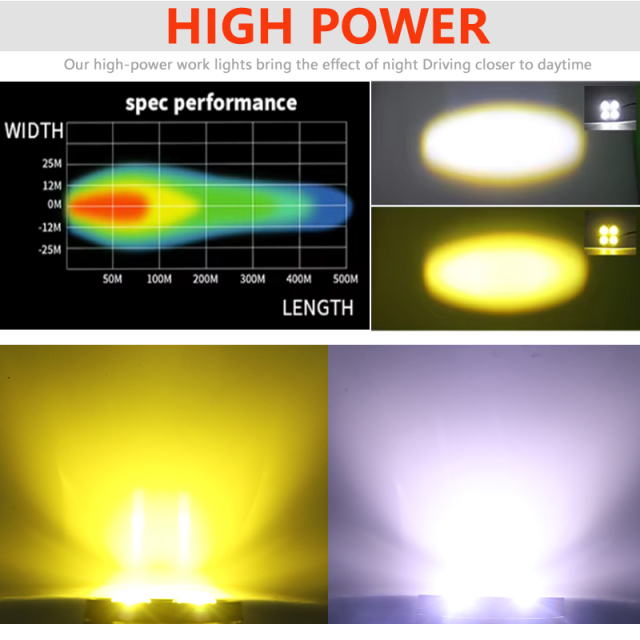
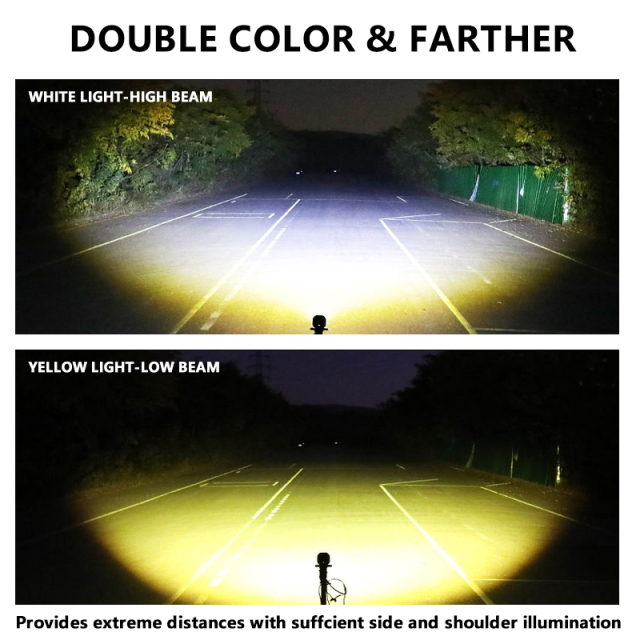
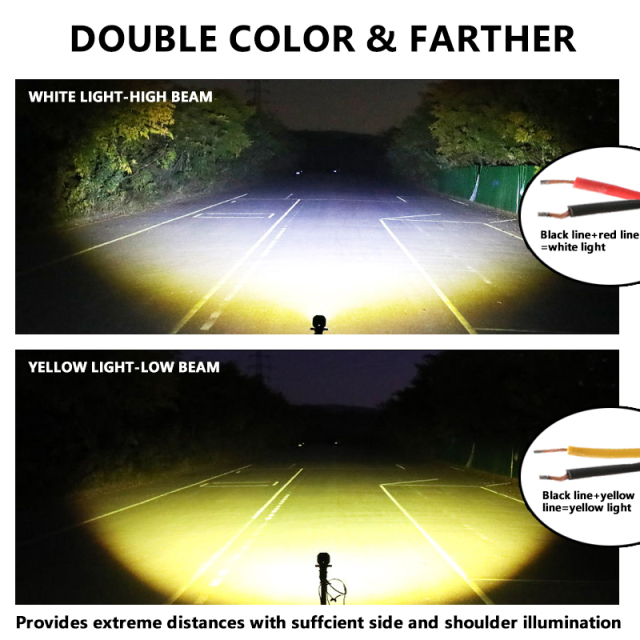
- Yellow low beam at 3500 K. A warm beam for fog, falling snow, heavy rain and dust. Longer wavelengths pass through water droplets instead of scattering back off them, so the driver sees the road surface rather than a wall of glare.
- White high beam at 6000 K. A crisp, daylight-toned beam that reaches further down the road and picks out the shoulders, markers and roadside furniture on a clear night — the mode for truck driving lights duty on unlit routes.
- Switching between the two. Both beams run through the pod's tail wire, with the black and red leads carrying the white-light circuit. Bring them to a two-position switch if you want to change colour from the cab, or to a single circuit if one beam covers your route.
- The same beam shape either way. Yellow and white share one optic, so switching colour changes the tone and the penetration, not the pattern you have already aimed.
- Spot and flood together. A high-transmission lens over the multi-lens optic throws a combined pattern: a defined centre for distance and a softer spread over the verge, so you are not choosing between seeing far and seeing wide.
- One housing instead of two. Two lamps mean two brackets, two wiring runs and two places for water to get in. A single sealed pod removes all three, keeps the front of the vehicle uncluttered, and is why compact off road lights are replacing twin-lamp setups on many builds.
Material & Build
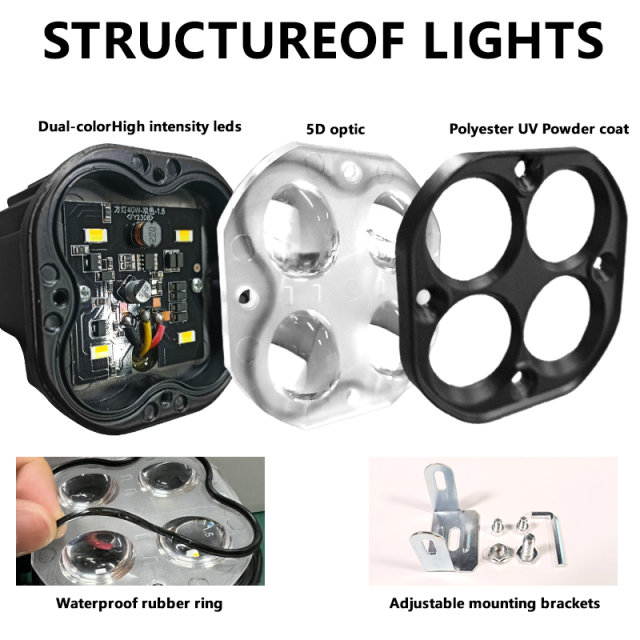
A pod light lives or dies at its joints, and this one is assembled rather than clipped together. The lens sits on a waterproof rubber ring with a gasket behind it, and the front face is screwed down to the body, so water runs off the outside instead of tracking in to the optic. That single detail is the difference between a lamp that survives a winter of road spray and one that fogs on the inside of the lens in its first wet month. The outside is finished in a matte black polyester UV powder coat. It resists chalking under strong sun and does not stain from road salt, so a fleet that washes its vehicles regularly will not end up with lamps that look older than the trucks they are bolted to. The mounting bracket is stainless steel, which matters most in the bolt somebody has to loosen two years later to re-aim the lamp. Impact resistance is handled by the lens material rather than by a bulky surround. It takes stone strikes and branch scrapes without cracking, and it does not need a separate guard that would block light and trap dirt. It is the same construction discipline we apply across the range, and it is what buyers comparing led light bar manufacturers look at first: not the claimed output, but the joints, the sealing and the finish.
Heat Management & Service Life
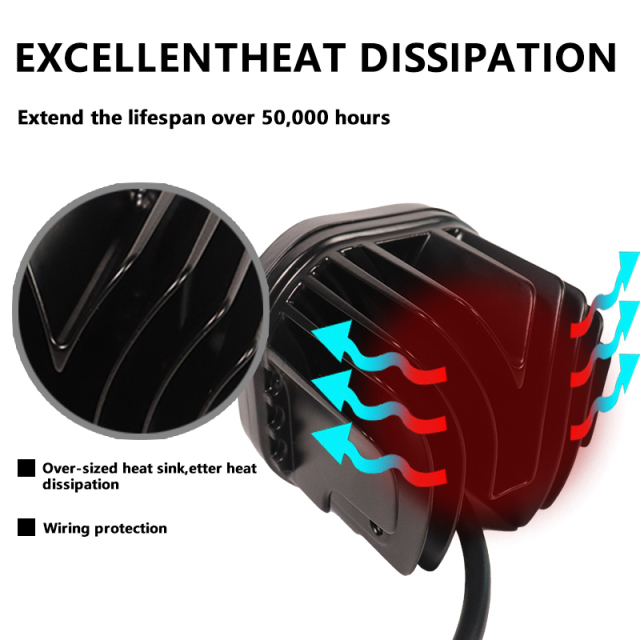
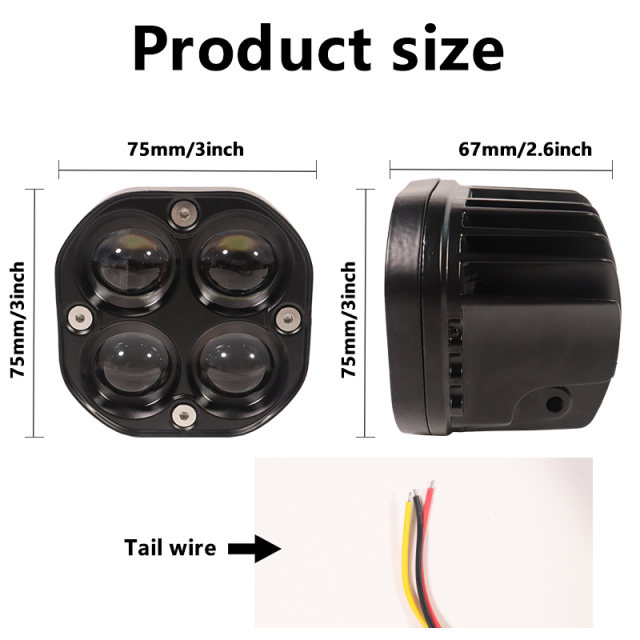
- A finned heat sink, cast into the body. The rear of the housing carries deep fins, which gives the light far more surface area than a smooth shell would and lets moving air carry heat away.
- A short path from LED to metal. The board sits against the die-cast body rather than behind a plastic carrier, so heat leaves the chip before it has time to build — the kind of path led light bar manufacturers aim for when a lamp is expected to hold its output.
- Why it matters over a long night. Heat is what shortens the life of offroad led lights: run a pod hot and output slowly drops while the colour drifts. Keeping the housing cool is how the beam stays where it started after six hours of work.
- Rated for more than 50,000 hours. In vehicle terms that is a long service window — a nightly-duty auxiliary lamp should outlast the truck it is bolted to, and certainly outlast the bulbs it replaces.
- Nothing inside to wear out. There is no filament to burn or gas to escape, so routine attention is a wipe of the lens and a check that the bracket bolts are still tight.
- Keep the fins clear. Mud, packed snow and heavy dust insulate the housing. Brushing the fins off after a bad run is the one habit that keeps thermal performance where it should be.
- Built for hard use. Dust, salt, vibration and heat are the four things that end a set of 4x4 off-road lights early, and each one is handled in a different part of the housing — sealed joints, coated metal, a screwed-together assembly and the fins.
Mounting & Aiming
- Pick the position. Bumper, bull bar, A-pillar, roof rack or rear work position — check that the bracket can swing through its full arc without fouling the bodywork. On most 4x4 builds running offroad led lights, the A-pillar and the leading edge of a roof rack are the two common spots.
- Bolt the bracket to the vehicle first. Fit the stainless bracket to the mount point, then hang the pod on it. The base bolts are far easier to reach before the lamp is in the way.
- Set a rough angle by hand. Tilt the pod slightly down for near-field work and road edges, or lift it for distance. Tighten just enough to hold the position while you test.
- Run and secure the tail wire. Route it clear of sharp edges and hot surfaces, leave a small service loop at the pod, and connect to your switch circuit.
- Aim at night against a wall. Park on level ground facing a wall or garage door, switch on, and adjust until the cut-off sits where you want it. One pod at a time is quicker than chasing two beams at once.
- Match a pair. If you are running two pods, set the second to the same height and angle so the beams overlap instead of crossing.
- Re-check after the first rough trip. Vibration settles new mounts. A quarter-turn on the bracket bolts after the first long drive prevents a slow droop.
Fog, Rain & Snow Visibility
Fog is not one condition. There is the thin morning mist that settles in a valley, the thick bank that sits on a motorway for thirty kilometres, and the sudden wall of spray thrown up by the truck ahead. All three cut down the amount of road a driver can see, but they do it in different ways, and the answer at the lamp is the same: get the light low, keep it warm, and stop it shining back into the cab.
White light is the problem in these conditions. Water droplets in the air are close in size to the shorter wavelengths of a white beam, so the light scatters off them and returns as glare — the driver ends up looking at the fog rather than through it. A yellow beam carries longer wavelengths that pass through the droplets instead of bouncing back off them. The road surface, the lane markings and the edge line come back into view, and nobody is squinting into a bright wall.
Aim matters as much as colour. A yellow beam set too high throws light into the fog and puts glare back in the cab; set level and low, it picks out the surface a safe distance ahead. On a snow-covered road the same setting shows the edge of the carriageway without lighting up the bank beside it.
For operators running off road lights for trucks on fixed routes, the practical gain is consistency: the driver sees the same pool of light at the same distance, in the same place on the road, whatever the weather is doing. That is what makes following distance and speed judgement easier on a bad morning, and it is why the setting is worth practising on a clear night before the weather turns.
There is a time to leave it off, too. On a lit urban road an auxiliary lamp adds glare for everyone and light the driver does not need. The yellow beam earns its place on unlit routes, in spray and in falling snow — the conditions where truck driving lights do most of their real work.
Off-Road & Recreational Use
- Night trail runs in a group. Dust hangs in the air behind the vehicle in front, and the yellow beam cuts under it where a white beam would light up the cloud. Switch to white on the clear stretches and back to yellow in the convoy.
- Light at the front wheels. A pod aimed steeply down at the leading tyres shows the line they are actually taking, which is exactly where a headlamp leaves you blind. A-pillar or bull bar pairs work well for 4x4 off-road lights setups.
- Pickups that work all week. For a modified truck that commutes Monday to Friday and hits trails at the weekend, one pod covering both job types means nothing to unbolt and swap. It is a practical answer if you are shopping for led driving lights for trucks that have to do two jobs.
- Overlanding and camp. White beam for picking a route into a campsite after dark, and the same pod lights the ground around the vehicle while you set up.
- Trailers and boat decks. A rear-facing pod on a trailer, or a deck-mounted unit on a boat, lights the working area during loading. Rinse the housing after saltwater exposure.
- Motorcycles and dual-sport bikes. The compact body and adjustable bracket suit fork or crash-bar mounting, with enough output for unlit back roads.
- Tractors and yard work. Implement checks at dusk, gateway manoeuvring and loading in the yard — short, frequent jobs where a controllable spread beats a long-range pencil beam.
Fleet & Heavy-Duty Integration
- Built around factory lighting, not instead of it. The pod is an auxiliary lamp, so it mounts ahead of or beside the factory units and adds to them, which keeps the vehicle's original LED driving lights and wiring intact for inspection and resale.
- Mixed fleets. A truck, a support pickup and a towed trailer can all take the same pod on the same bracket. Standardising on one service part cuts the number of boxes a workshop keeps on the shelf.
- Construction and utility work. Front-mounted pods give site vehicles a usable spread for manoeuvring in the dark, and the sealed body takes dust, wash-down water and the vibration that comes with rough ground.
- Driver handover. Yellow for weather, white for the open road — a rule any driver picks up in a minute, with no menu to scroll through and nothing to program. Keeping a fleet on a single build standard is the simplest way to make service life predictable.
- Paperwork for your market. Auxiliary lamp rules differ from country to country. Tell us where the vehicles operate and we will confirm which documents your inspection authority expects.
Specifications
Adjustable brackets keep installation straightforward, so retrofits and fleet upgrades take less time off the road. The IP67 rating covers resistance to moisture and dust ingress, a point that matters in off-road and construction work. For the operator this means steady light output for safety and continuity of work.
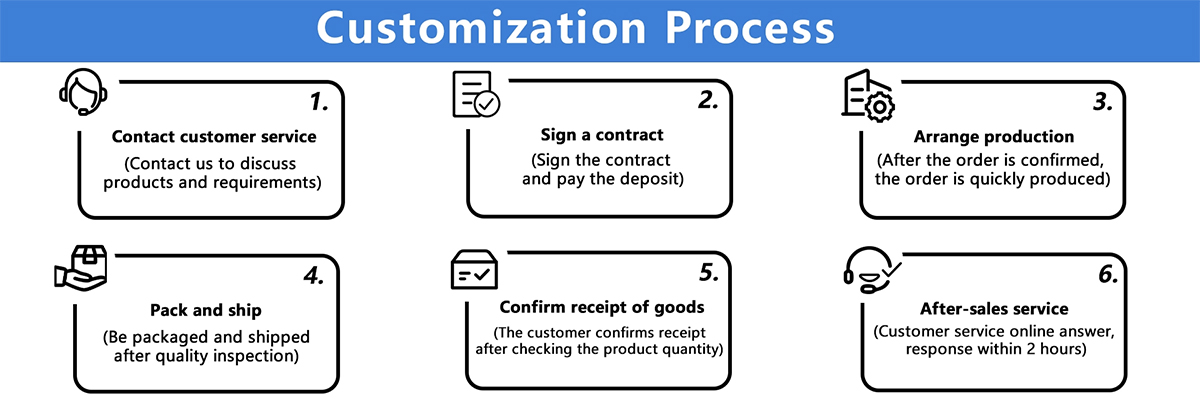
Customization & Ordering
- Orders run two ways. Stock specification ships as it comes off the line, and that is the fast route: 7-day fast shipping covers items we hold in stock, so a counter restock or a replacement for a failed unit does not leave a vehicle stranded. Custom work takes longer because it is built to your brief, and the schedule is agreed with your sales contact once the specification is fixed.
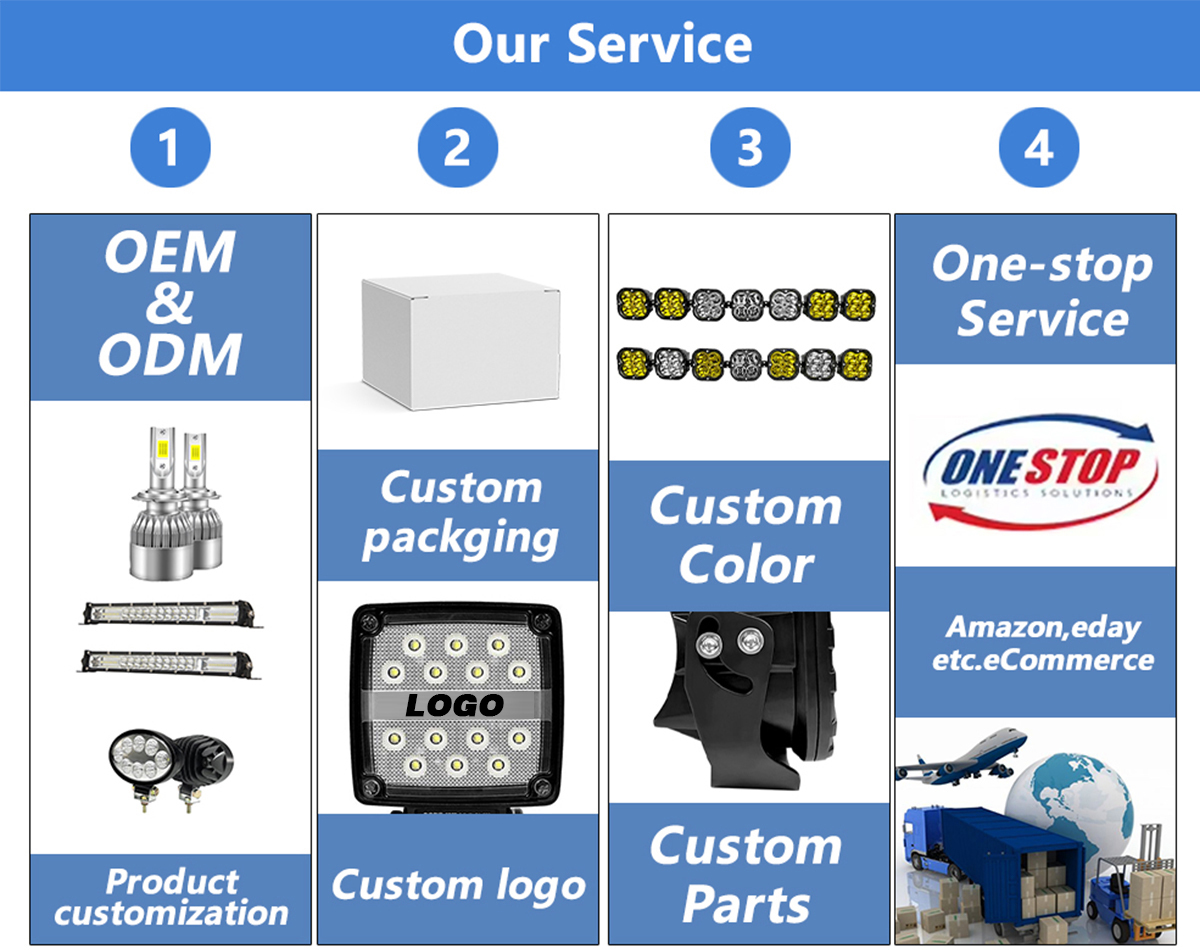
- The custom side covers the things that make a product yours rather than generic: size, housing colour, logo and packaging design. Distributors building a custom off road lights line often start with logo and packaging on a proven pod like this one, then move to specification changes once the volume justifies it. Send the artwork, the packaging format you have in mind and the vehicle or system it will be sold into, and we will come back with what is practical.
- Bulk orders are coordinated so deliveries land on your schedule rather than ours. Quantities, packing method, payment terms and the documents your market needs are all confirmed with your sales contact before the order is released. Whether you are restocking a shelf or placing a season's order for led driving lights for trucks, tell us the destination and the deadline first — that shapes the quotation more than anything else.
- After-sales runs through the same contact. If a unit arrives damaged or does not perform as specified, report it with the order number and photographs of the packaging and the unit, and we will look into it with you.
- You can reach the team at Szvictory2005@163.com or on +86 15362436281 (Paul). Tell us the vehicle, the quantity and the branding, and we will take it from there.
- One pod, fully assembled and sealed, with its tail wire already fitted and the black and red leads for the white-light circuit brought out. Nothing inside the housing needs opening before it goes on the vehicle.
- The adjustable stainless steel bracket, which is the part that lets a single pod sit on a bull bar, bumper, A-pillar or roof rack and be re-aimed later without new hardware.
- The mounting screws and bolts for the bracket, together with the Allen key that tightens them — small parts, but the ones that decide whether an install finishes the same day.
- The electrical run belongs to the vehicle rather than the box, so plan it into the job: a switch (a two-position one if the driver wants yellow and white selectable from the cab), a relay and fuse for the circuit, cable from the tail wire back to the switch, and connectors.
- If the vehicle is leaving with two pods on the front, order the pair together. Both then come off the same production run and match in output and finish, which is not guaranteed when a second pod is bought later from stock.
- Count the parts against this list before the vehicle goes on the ramp. A missing bolt turns a one-visit fitting into a second shipment and a second booking, and it is far easier to raise on arrival than halfway through the job.
- Report any shortage or transit damage with the order number and a photo of the packaging and the parts, and we will take it up with you directly.
Scale & Supply Capability
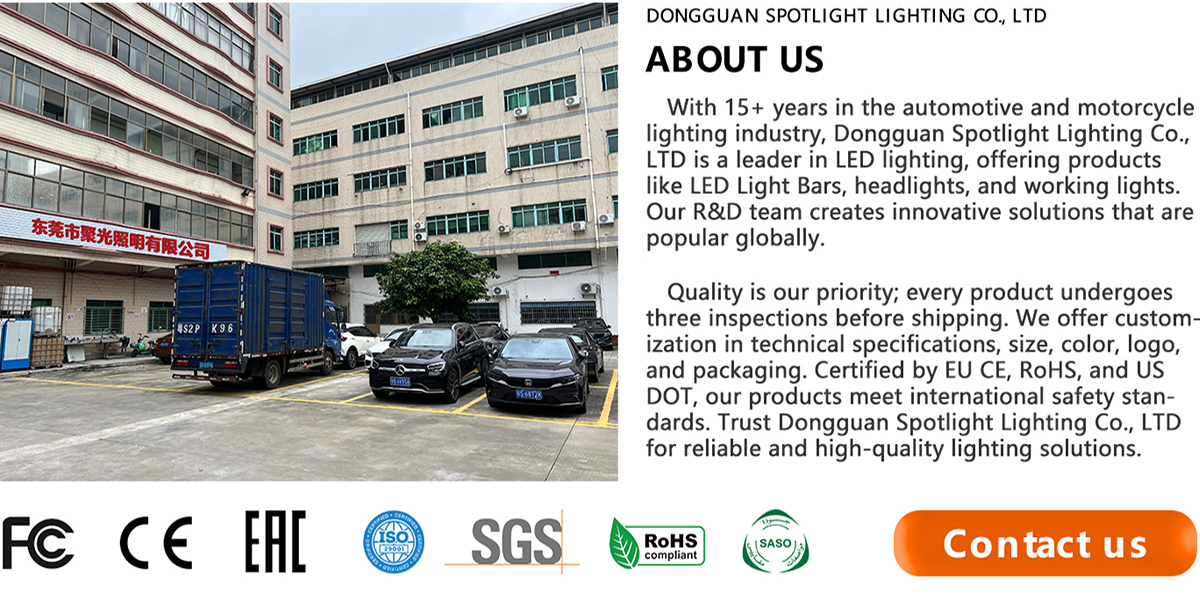
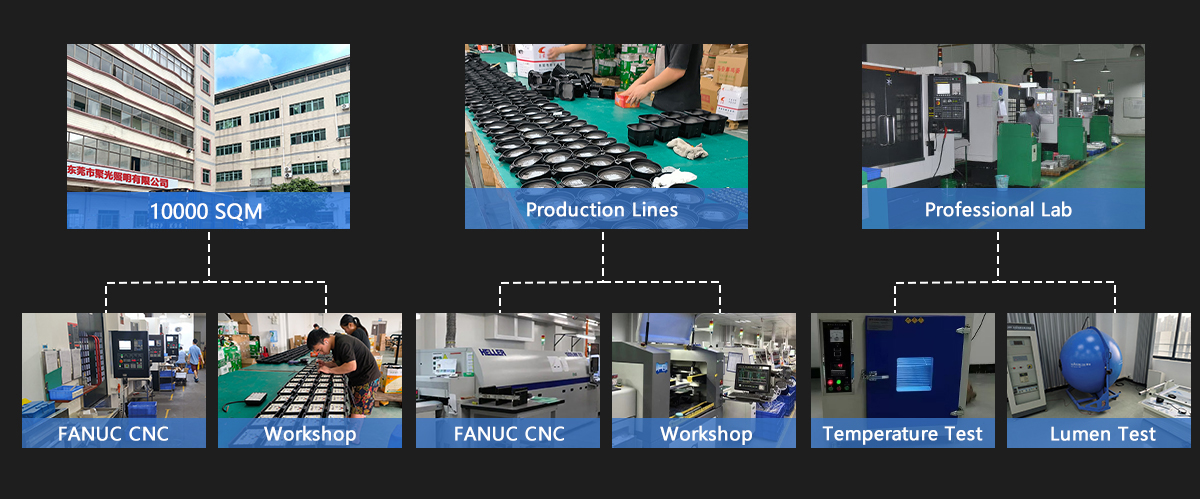
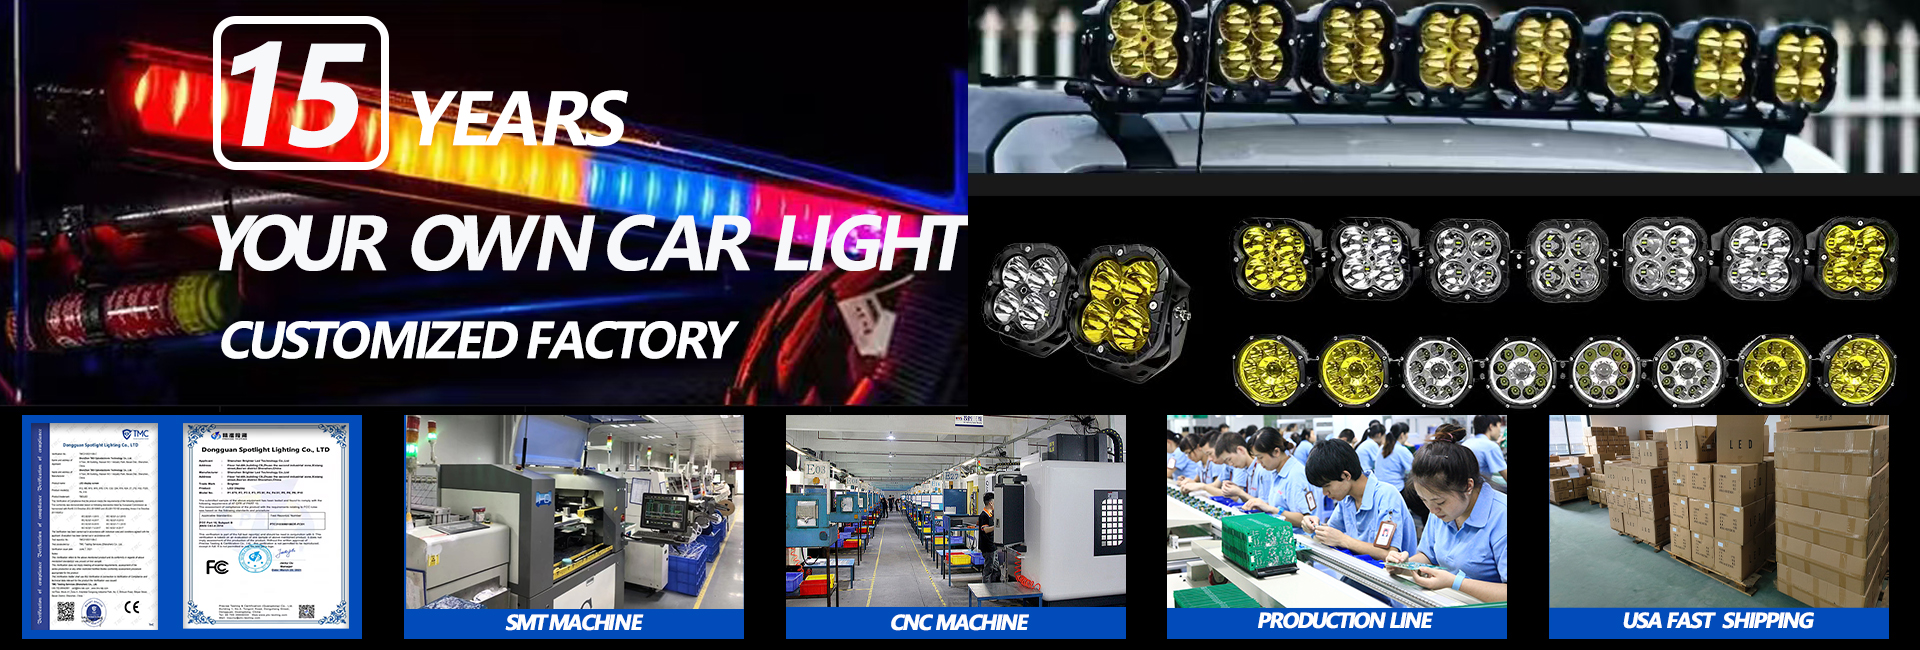
JOPOWER is the brand of our own factory in Dongguan, China, founded in 2010 and run by a team of 20–30 people with 15 years of vehicle lighting production behind them. We add 5–10 new styles every month, hold EU, CE, RoHS and US DOT certification, and put every unit through three full inspections before it leaves us. Because the designs are developed in-house, we can tailor specification, style, size, color, logo and packaging, and items in stock ship in as little as 7 days.
FAQ
What materials are used in the construction of these LED pod lights?
The housing is aviation-grade aluminum alloy, die-cast as a single body with the heat-sink fins cast in, and the lens is impact-resistant polycarbonate. The lens sits on a waterproof rubber ring with a gasket behind it, the bracket is stainless steel, and the body is finished in a matte black polyester UV powder coat. Those four materials do most of the work: aluminum carries heat away from the LED board, polycarbonate takes impacts that would crack glass, stainless keeps the mount adjustable years later, and the coating holds up to sun and road salt. Buyers comparing offroad led lights usually start with exactly these four points.
Can JOPOWER customize these LED driving lights for specific vehicle needs?
Yes. Vehicle-specific requests usually come down to mounting and wiring: which position the pod will sit in, how much tail wire you need, and whether both beams should run to one switch or two. We also handle logo, housing colour and packaging for buyers building their own custom off road lights line. Send the vehicle details, the mounting position and the branding you have in mind, and our team will confirm what can be changed and what stays standard.
How does the mounting system work?
Each pod hangs on an adjustable stainless steel bracket. The bracket bolts to a flat or slightly angled surface and the pod pivots on it, so you can set the beam low across the road or lift it for distance without shimming the mount. Before you drill, check that the bracket has room to swing through its full arc. Re-tighten the bolts after the first long drive, because new mounts settle. The bracket, the mounting screws and bolts, and the Allen key for assembly all come with the pod.
Will this pod fit my vehicle?
It is a universal-fit auxiliary lamp and has been fitted to cars, SUVs, 4x4s, ATVs, UTVs, Utes, trucks, tractors, excavators, trailers, boats, motorcycles, bicycles and mining equipment. The thing that really decides fitment is the flat area you have for the bracket, not the badge on the bonnet. Measure the mounting surface you have in mind and send a photo of where the pod will sit. If you are replacing an existing set of off road lights, the old bracket holes usually dictate the position, so show us those too.
What comes with each pod?
One pod light with its tail wire already fitted, the adjustable stainless steel mounting bracket, the mounting screws and bolts, and the Allen key for assembly. The lens and housing arrive assembled and sealed, so there is nothing to build before you mount it. If you are fitting a pair, order them together so both pods come from the same production run and match in output and finish.
How do I confirm the electrical match for my vehicle?
Tell us the vehicle, its system voltage and how you plan to switch the pod — one circuit for a single beam, or a two-position switch for yellow and white. We will confirm the wiring arrangement and the connection point before the order leaves. If the vehicle already runs auxiliary lighting, a photo of the existing relay and switch setup saves a round of questions.